STEP ONE:
I usually do my CG paintings from beginning to end in Photoshop. This tutorial will be using Photoshop CS running on a tablet PC (so you mouse people are out of luck - I haven't used a mouse to draw in 10 years). Sometimes I do a sketch in pencil first, but for the purposes of this guide I will be working from scratch.
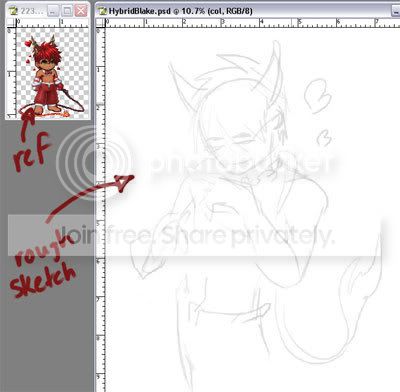
So the first step is a very rough sketch. This is mainly to get the pose and proportions worked out. Brush or colour doesn't matter at this point because this sketch will not be at all part of the final piece.
STEP TWO:
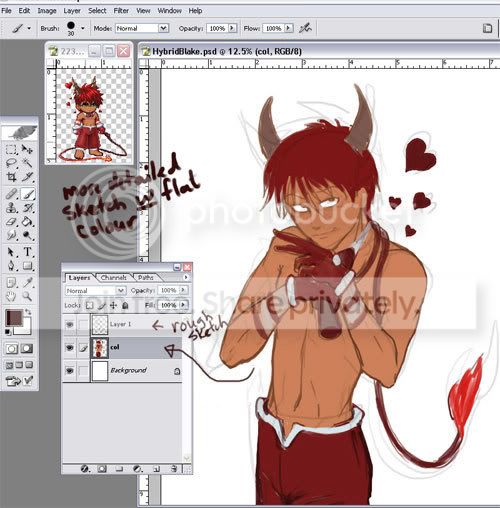
Next, make a new layer. This layer will be the foundation for all the painting. Put this layer underneath the rough sketch layer and set the rough sketch layer to multiply.
On the new layer, rough out the figure in a more detailed sketch. This sketch doesn't have to be perfect - it's not line art, just a base to start painting on. I am also laying down flat colour at this stage.
If you would prefer, you can keep different body parts on separate layers so if you mess up one it's easier to fix. I will sometimes keep hair and clothing on separate layers if they require a lot of detail. For this project I'm keeping everything on one layer because it's just easier for me that way.
STEP THREE:
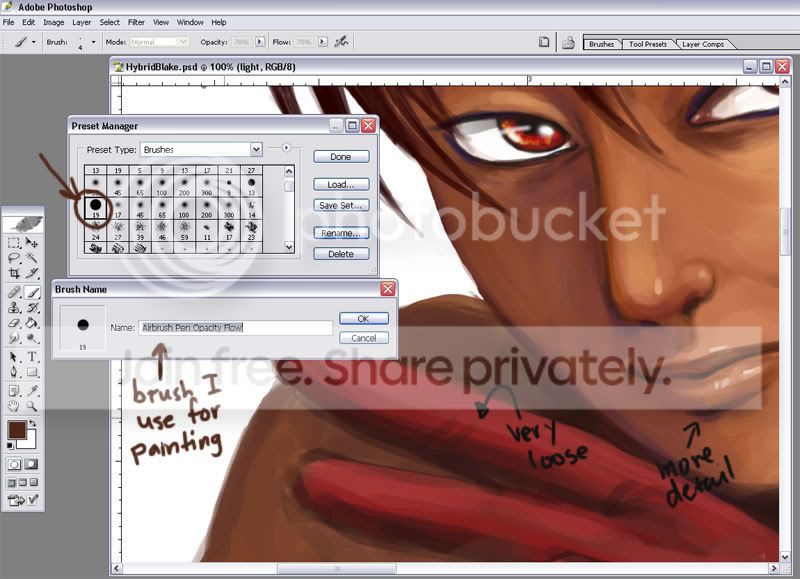
Now it's time to start painting. Basically, the principles are much the same as working in traditional media. I have one brush that I like to use for most of the work. It is one of the default brushes in Photoshop and it's called the Airbrush Pen Opacity Flow. Most of the time I have it set at around 70% opacity and 70% flow. For speed purposes, I also have my keyboard set up with some shortcuts. I have a key for (-)brush size and (+)brush size, as well as a key for the eyedropper tool. This allows me to change brush sizes on the fly and keep my palette consistent by always grabbing colours from areas I already painted. If you find it hard to grab the colours you want, you can make a palette in the space beside your painting or in a separate file - as you use a colour just dab it in your palette and use the eyedropper tool to grab it again when you need it.
I paint in an acrylic/oil style, meaning from dark to light. I start with a darker variant of the flat colour I laid down and work out where all the shadows are going to fall. Then I shade by blending mid tones and shadows. Highlights always come last.