Hello! I'm Felina75. I go by Felina or Fel to my friends. I'm an older Gaian, and I have been crocheting for about 30 years and sometimes my hands ache for my hooks. cat_rofl As my hubby can attest to, I'll be sitting on the couch watching TV and all of a sudden I'll jump up and go exploring my yarn closet for inspiration. Yes, I have a walk in yarn closet. emotion_kirakira
My grandmother, mother and our next door neighbor taught me how to do what I call traditional crochet and Tunisian crochet, or shepherds knitting as my grandmother called it. They taught me patterns from memory that had been passed down from generation to generation. Unfortunately they did not know how to read crochet patterns. Determined to create more than those early patterns, I taught myself how to read them.
My favorite type of crochet patterns are tapestry crochet which I love to design myself. I currently have one that I've started for my nephew for a High School graduation gift. The width of it is the length of my couch. emotion_facepalm
I taught myself how to knit, but it's not my favorite craft. I love to cross stitch and have even gotten my hubby to try it. Surprisingly, he did enjoy it. I also do pencil art which I've framed and given to family for Christmas. I love to cook and discover new recipes. I love to sing and I also play the violin.
My favorite thing to do beside crochet is write books. I'm not talking manga or anything of the sort. I write science fiction novels. I even took an online course through Stratford Career Institute and graduated with high honors. I was attempting to publish a book" Between the Chicopee Trees, but I don't really want it published since it's a historical fiction set in Massachusetts and Nova Scotia around 1889. Unfortunately, I don't want to be saddled by the publishing house to write more like it. *shrugs* Your first work is never traditionally published anyway. It will always be rejected. cat_rolleyes
My husband and I homeschool our four children. I never have to make time for crocheting, because it's just so much a part of me that I'm always "hooking it." lol.
If you need to find me, most of the time I can be found here, on Gaia.
►Reminder◄ Please DO NOT post any comments in this gallery. If you have any comments or questions, please PM me or leave a comment on my profile. Thank you.
Posted: Wed Sep 04, 2013 4:07 pm
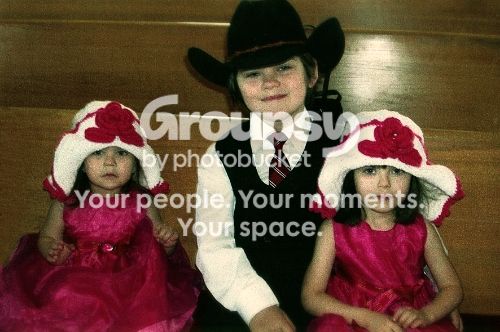
~Floppy Sun Hat~
Details:I found the pattern but I couldn't find who it belongs to. cat_redface It was free and if anyone knows whose it is, please let me know if anyone finds out so that I can give them credit for it. Thanks. cat_4laugh
Floppy Sun Hat Crocheted Materials ~ Yarn according to gauge guide 3oz main color, small amount contrasting color ~ Hook size according to gauge guide ~ Yarn needle Use this guide to help determine yarn and hook size depending on size wanted. Please remember that although the measurements seem small you want the hat 1 to 2 inches smaller around than the actual head measurement for a perfect fit. Gauge:
~ With main color ~ Chain 5, sl st to form a ring Rnd 1-Ch 3 work 14 dc in ring, slst to top of ch 3 Rnd 2-Ch 3 work dc in same space as slst, work 2dc in each dc around, slst to top of ch 3 Rnd 3-Ch 3 (2dc in next dc, dc in next dc) around ending with 2 dc in last dc, slst to top of ch 3 Rnd 4-ch 3, dc in next dc (2dc in next dc, dc in next 2 dc)around ending with 2 dc in last dc, slst to top of ch 3 Rnd 5- ch 3, dc in next 2 dc (2 dc in next dc, dc in next 3 dc) around ending with 2 dc in last dc, slst to top of ch 3 (will have 75sts) Rnds 6-15-ch 3 dc in each dc around, join with slst to top of ch 3 Rnd 16- ch 3, dc in next 2 dc (2 dc in next dc, dc in next 3 dc) around ending with 2 dc in next dc, dc in last 3 dc, slst to top of ch 3 Rnd 17- ch 3, dc in next 2 dc (2 dc in next dc, dc in next 3 dc) around ending with 2 dc in next dc, dc in last dc, slst to top of ch 3 Rnd 18- ch 3, dc in next 3 dc (2 dc in next dc, dc in next 4 dc) around ending with 2 dc in next dc, dc in last dc, slst to top of ch 3 Rnd 19- ch 3, dc in next 4 dc (2 dc in next dc, dc in next 5 dc) around ending with 2 dc in next dc, dc in last dc, slst to top of ch 3 Rnd 20- ch 3, dc in next 5 dc (2 dc in next dc, dc in next 6 dc) around ending with 2 dc in next dc, dc in last dc, slst to top of ch 3 ~ Change to contrasting color ~ Sc in each sc around, slst to top if first sc (will have 185 sc) Ch 1 *sc in next 5 sc, work picot (ch 3 slst in first ch)* repeat between * around slst to top of first sc, finish off Rose instructions (contrasting color) Ch 5 slst to form ring Rnd 1- ch l (sc in ring ch 3) 5 times slst to top of first ch 1 Rnd 2- ch 1, work sc, hdc, 3dc, hdc, sc in each loop around slst to top of first sc Rnd 3-working in the back working around the post of the sc in rnd 1, ch 1 slst around post, ch 1 sc around same post, (ch 5 sc around next post) around ending ch 5 slst to top of first sc Rnd 4- ch 1 (sc, hdc, 5 dc, hdc, sc) in each ch 5 loop around, slst to top of first sc Rnd 5- ch 1 slst around post of sc in rnd 3, ch 1 sc around post, (ch 7 sc around next post) around ending ch 7 slst to top of first sc Rnd 6- ch 1, (sc, hdc, 7dc, hdc, sc) in each ch 7 loop around, slst to top of first sc. Finish off. Leaves (make 2) (contrasting color) CH 11, sc in second ch from hook, hdc in next 2 ch, dc in next 6ch, 8 dc in next ch, working in free loops from ch, dc in next 6 ch, hdc in next 2 ch, sc in last ch, slst to top of first sc, slst across each hole from original chain across, finish off. Turn brim up, sew rose on, and sew on leaves putting the round end under rose.
I made these two hats for my daughters for Easter. I made them bigger on purpose so that they could wear them year after year. Pictured are 3 of our 4 kids a few years ago. My how they have changed. cat_crying
Felina75 Captain
Cheery Conversationalist
Offline
Felina75 Captain
Cheery Conversationalist
Offline
Posted: Wed Sep 04, 2013 6:35 pm
~Sugar Bunnies~
Here is a crocheted bunny mother and her bunny baby with a baby bottle. The baby bunny is a tiny bag that you put individually wrapped candy inside. His bottle holds a package of LifeSaver candies. I made this as a gift for someone who was in the hospital and needed a pick me up. I also thought it would make a great baby gift at a baby shower. cat_4laugh
Details: I used Red Heart Super Saver yarn. The pattern can be found in this book which you can easily find on eBay.
This pattern was designed by Mae Meats. It comes from an Annie's Attic book called Sugar Bunnies to Crochet. I did customize the sun hat though.
Posted: Thu Sep 05, 2013 7:18 am
~TwoChristmasBlankets~
Details: The patterns came from a crochet book. I need to look through my books and find them.
That is an early pic of me cat_redface with my 2nd and 3rd blankets that I made after I learned how to read patterns. Back then I worked at a home owned bank in a little town with two wonderful ladies in the bookkeeping department and I made those one year as their Christmas gifts. Those blankets were so much fun to make. The picture was taken by my mother-in-law at her house. To fit them into the picture, the one on the left was laid out with the other folded in half lying on top.
Felina75 Captain
Cheery Conversationalist
Offline
Felina75 Captain
Cheery Conversationalist
Offline
Posted: Sat Sep 07, 2013 4:25 pm
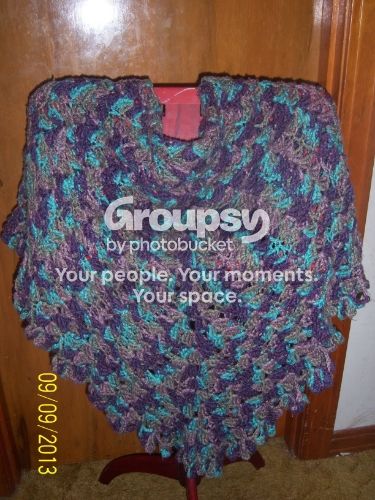
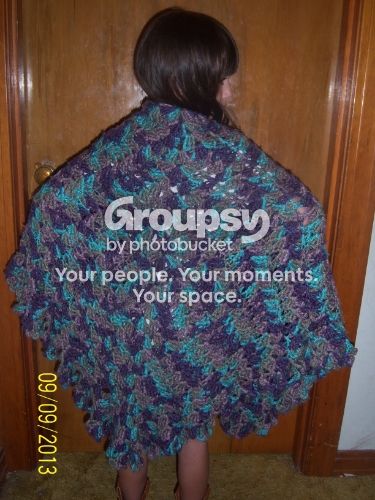
~Shetland Shawl~
My eldest daughter modelling the shawl.
I found this free pattern at Antique Crochet Patterns. It was first published in 1915 and it's worked from the center and is square.
It took approximately 6 - 2.8 oz. skeins of BERNAT Softee Chunky (Shadow) and 5 each of rds. 6, 7, & 8 to reach 36 in. With 4 kids and our busy schedule, it took me 6 days to complete.cat_redface
I made it during winter when everyone in the house was sick with the flu. It was a pleasure to make. It's my favorite project that I've done for myself. By the way, I never did get sick.cat_4laugh
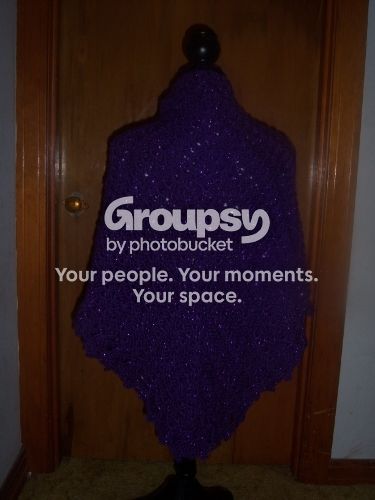
Below are 3 other shawls I made from the same pattern in 2014.
~I made the off white colored one for my daughter. She wore it around the house during the winter months when our house was a little chilly.
~I made the red one for myself, because I just love shawls! heart
~I made the purple sparkly one for my hubby's grandmother for our 2014 Christmas. She loved it.
~I made the two toned green shawl for myself and whomever wants to use it. The edging was made exactly as the original pattern stated. It took approximately 35 oz of worsted weight yarn to complete. I had planned on finishing it on our mountain trip in 2015, but we didn't end up going on vacation that year. cat_crying
I used approx. 30 oz. of Red Heart Soft yarn for the off white and the red colored ones and approx. 30 oz. of Caron Simply Soft Party yarn for the purple one.
Edging Notes: I used 3 skeins of Red Heart Super Soft (discontinued 10 oz skeins) yarn but only had enough yarn to complete first round of edging following the pattern found in the link above. Instructions for last round:After completing 1st round of edging as the pattern link states, sc into beginning long tr group, *ch 5, dc into 5th ch from hook, sc into same long tr group, ch 3, dc between next long tr group, ch3, sc into next long tr group *. Repeat from * around, sl st into beginning sc, finish off or invisible join.
Posted: Tue Sep 10, 2013 12:04 pm
Last Updated: 9/28/2013
~JewelryProjects~
~~~~~~~~~~~~~~~~~~~~~~~~~~~~~~ ~Sterling Silver Wrapped Turquoise Pendant~ ~~~~~~~~~~~~~~~~~~~~~~~~~~~~~~ Front Back
Items used to make pendant: 22 and 18 gauge SS wire Link and Link a turquoise cab purchased from eBay 8.5mm SS bale with drop Link
It took about 30 minutes to put together and was a blast to make.
Items used to create this necklace: 2mm round woven black cord Link Sterling Silver crimp tubes w/loop Link SS jump rings Link 17-15mm SS Clasp Heart toggle Link Dione Easy-On SS 7-1/2 snake chain bracelet Link Montana Silversmiths Kowboy Kids birthstone charms Hand turned olive wood beads from Bethlehem, Israel off of eBay
This design came from Firemountain Gems. Click the link to view the original design.
I modified it so that I could keep adding charms if we happen to have another little one. The silver chain you see is actually a snake chain bracelet. I removed the lobster clasp. One end of the chain can be unscrewed to add more charms. I chose the heart clasp and toggle because it reminded me of a baby inside a mother. It took about 15 minutes to put together.
I collect Kowboy Kids charms. They are a discontinued item from Montana Silversmiths and I love them! Don't ask me why. I've collected not only the ones I need for my kids, but I have a boy and girl charm for all 12 months. I think I'll keep collecting them though.
~Leather Cuff~
I made this cuff for my hubby and our nephew. They loved them and they're super easy to make. Almost all of the supplies needed for this project was bought at Tandy Leather Company.
Materials: Dyed Leather RemnantsLink. Leather Hole Punch Link. Buffalo Head Nickel ConchoLink. 2mm round woven black cord Link Leather Scissors Link. Glass Pony Beads (Tandys used to sell these, but now they only offer plastic ones. You may want to look around your local craft store or on eBay to find glass beads.)
Instructions:
Cut out the desired shape for a cuff or bracelet. With leather punch make 2 small holes about 1/3 - 1/4 of an inch apart as shown in the above pics. Thread the cord through the holes from the wrong side. Thread both ends through the beads and tie a knot at the end. On opposite side as the cord close to the end (see pics), use the leather punch to make a hole for the concho in the center of the leather strap. Attach concho and you're finished.
Enjoy! cat_4laugh
Felina75 Captain
Cheery Conversationalist
Offline
Felina75 Captain
Cheery Conversationalist
Offline
Posted: Tue Sep 10, 2013 6:40 pm
~Sailor's Valentine~
I finally took a picture of one of the two Sailor's Valentines that I made for Christmas one year. This is the one that went to my hubby's parents. It's pictured inside their display case so the lightbulb is reflecting off of the glass top of the valentine. The very top design is the same as the bottom.
About the piece: It took about a week to come up with a design, but it only took about 2 hours to glue the shells and sand in place. Then it took an additional 24 hours for the glue to set and dry.
Supplies: It was made using tiny seashells we purchased off of eBay. I dyed white sand with some blue food coloring. Everything was glued down with crafters glue. The glass case it's in was ordered online for $75 from a great guy who no longer makes them. cat_crying It's cherry wood and so beautiful. The pic doesn't do it justice. It cost approximately $100 to make, but I've seen them for sale anywhere from $250-$1200. If you want to order Sailor's Valentine boxes click this link.
I had so much fun making it. I wish I had made us one. emotion_kirakira
Click this link if you would like to read about the history of Sailor's Valentines.
I didn't have a One Pound Caron skein. Since I was making this for my daughters and needed it to be a little smaller, I used 6 3 oz. skeins of Green Oak Acrylic in #4012 Yellow.
I inherited this yarn from my hubby's grandmother when she passed away. She was known for making baby blankets in our community. Whenever there was a baby on the way, she would crochet a blanket for them. emotion_kirakira
I modified the pattern slightly because I am not a big fan of fringe.
Notes for border and butterflies: Use G hook and rose yarn to make border and the butterflies. Attach the butterflies with the same color as used to make the shawl so your stitches will not show. I added an abdomen to the butterflies to give it a 3D look. cat_4laugh
Materials for border: small amount(less than 1 oz.) of Rose yarn G Hook Yarn needle
Pattern for the border: With right side facing, with rose yarn and G Hook, beginning at the end of last row made, join with sl st in first ch3 dbcr, ch 3, sk next st, sc in next st, *ch 3, sk next st, sc in next st*, repeat from (*) around the entire shawl, join with sl st to beginning sl st, finish off.
Notes: It took about 30 minutes from start to finish. I loved making it! Enjoy. ^_^
Posted: Fri Sep 27, 2013 10:51 am
~CrochetedHat~
FRONT
BACK
I will include the pattern when I have time to type it out. It was a free pattern and I can't find the link. You can make one in a day. I made about 30 of these and donated them.
This was my first amigurumi project. I made it for my youngest son, because he loooves planes. The pattern is pretty simple to follow.
Posted: Sun Jan 19, 2014 7:22 pm
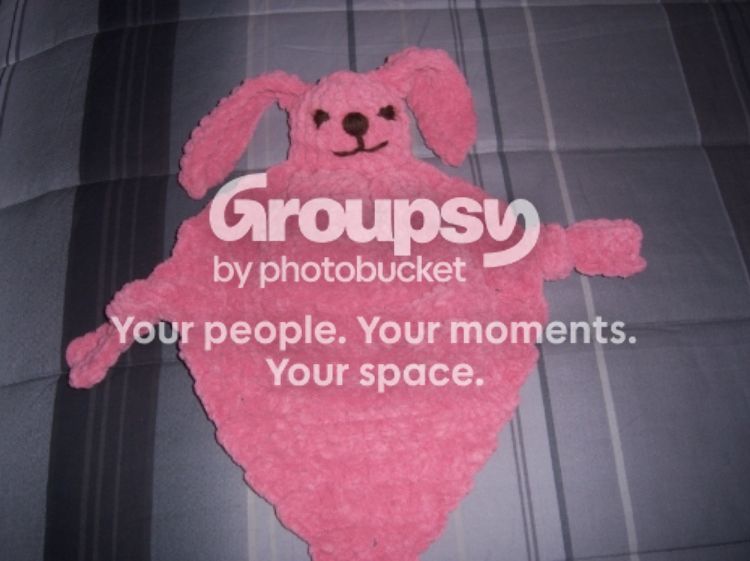
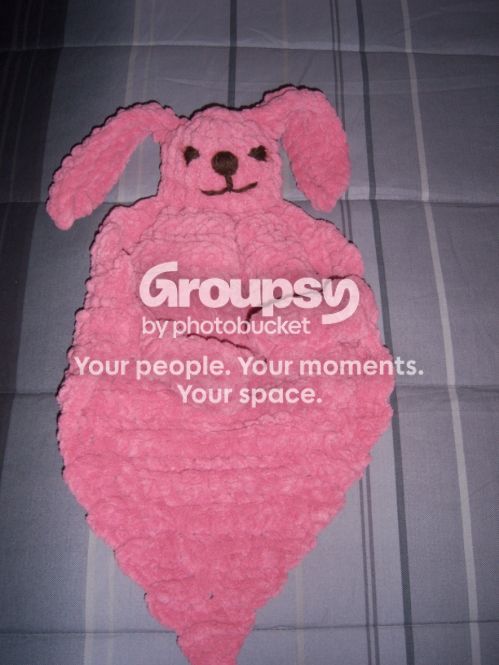
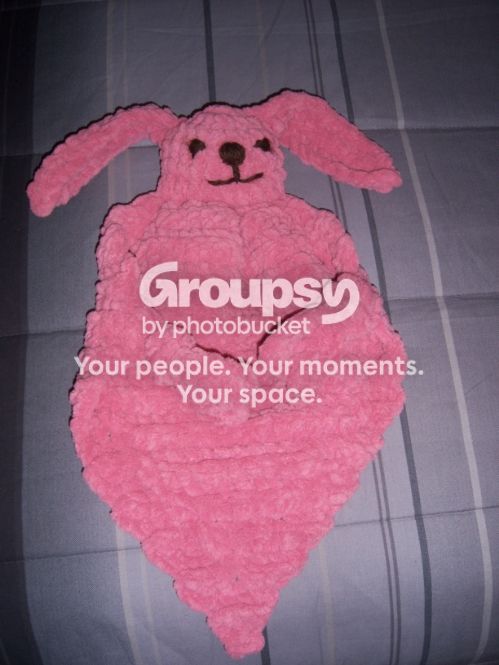
~Cuddle Bunny Blanket~
You can find the free pattern for this adorable stuffed animal blanket at the Lion Brand Yarns website. I used the same materials that they had listed for the one I made. I didn't want to use black for the eyes and I had some brown scrap yarn and used that to embroider the face. This makes it very safe for little bitty ones. It was a very easy pattern to follow and now all my kids want one. This one however found a good home with our newest little cousin.
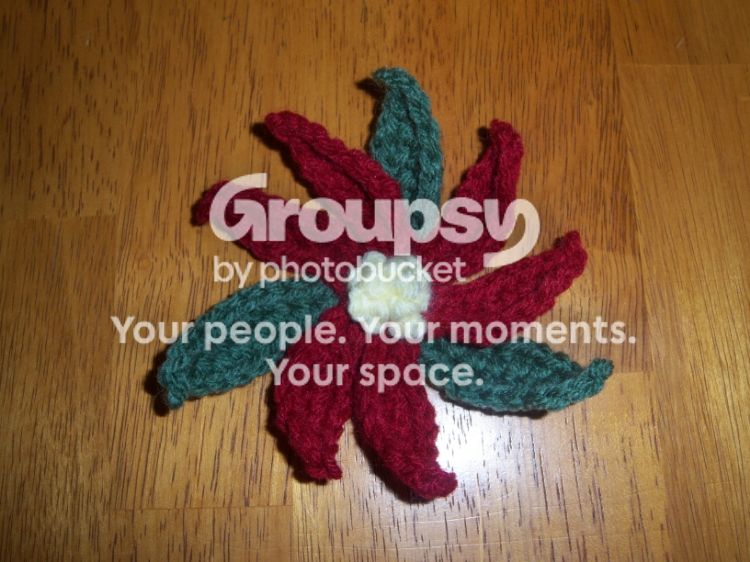
Supplies: small amounts of Red Heart Yarn in colors medium sage, burgundy, and pale yellow size H hook scissors large eyed embroidery needle for tucking end threads large safety pin
Special Note: Make sure to take notice of the corrections that were made to the pattern. I did not and was able to crochet 2 leaves together and made 3(2 leaf sections) and then sewed them together like they said. It turned out to be a little easier for me because I was only having to deal with 3 sections and not 6 individual leaves when it came time to sew them all together. You will notice in the above picture that you can see the 3 sections. If you don't like that look, make sure and fasten off at the end of each leaf. The pattern showed examples of only 1 green leaf but I made mine with 3 green leaves for balance.
It is a very simple pattern to follow and when it was finished I used matching color yarn to attach a large safety pin to the back of the poinsettia. We gave it to my hubby's grandmother as a corsage when she came to our Christmas Eve party. She loved it. heart
Posted: Sun Jan 19, 2014 8:31 pm
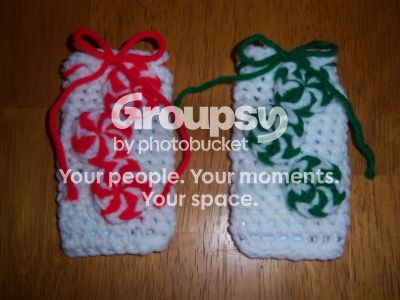
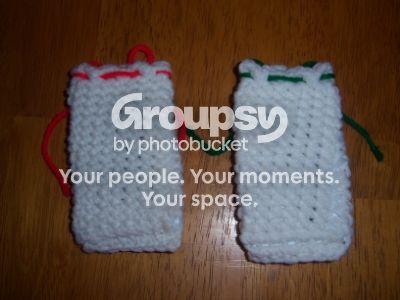
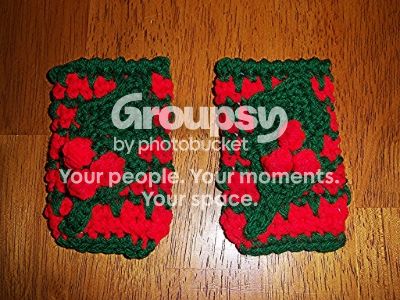
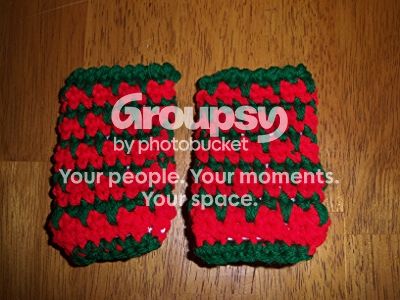
~CrochetedChristmasGiftCardCovers~
You can find the free pattern for the gift card covers here.
You can find the free pattern for the holly leaf with berries here.
You can find the free pattern for the peppermint candies here.
These patterns are very easy to follow. I did make one mistake though. cat_redface On the red and green spiked covers, I closed the bottoms the same way as for the white covers. If you'll notice in the pattern, there is a different technique to close them. But no one knew this when we gave them as gifts for Christmas. I still wish that I could have gone back and fixed it, but I didn't have time. I made these the day before the party.
*******Note:******* In the pattern for the peppermint candies, you will find out how to invisible join instead of the traditional way to finish off. I never knew how to do that and Kara, the designer shows a wonderful photograph tutorial for invisible joining. I will never finish off the same way again. Enjoy!