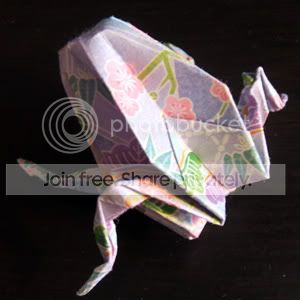


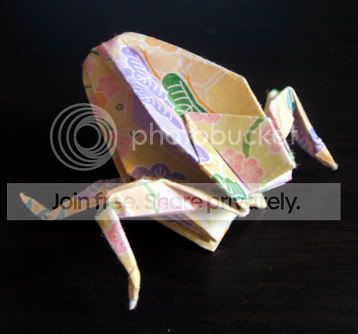
Difficulty: 2.5
Paper Type: Square, not easily worn
Sheets: 1
Cuts/Glue: No
Time: Less than 10 minutes
Source: The World of Origami by Isao Honda
Instructions:
Just a note: don't be confused by my fingers in these pictures - most of the time they're not doing anything except holding the model against the table. sweatdrop
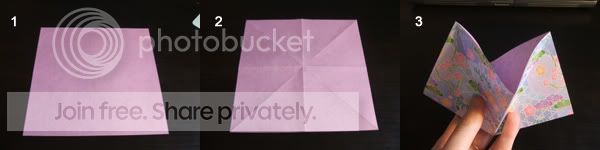
1. Start with a square piece of paper.
2. Precrease the paper along the diagonals and halfway marks.
3. Fold the paper in half and hold it with the fold pointing down. Grab the two bottom corners of the rectangle and push them towards each other.
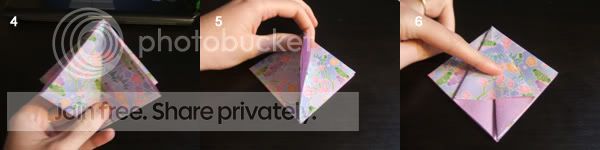
4. Arrange the resulting structure with two tabs on either side.
5. Grab one of the tabs and hold it upright.
6. Squash down the tab, making sure the center crease remains in the center.
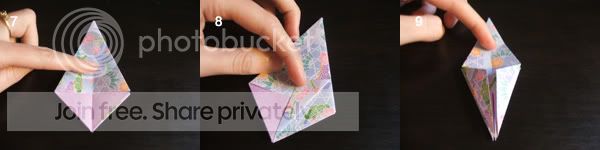
7. Do the same thing to the other three tabs.
8. Grab a corner of one of the newly formed tabs (there are eight tabs now) and fold it towards the center line.
9. Do the same for the other seven tabs.
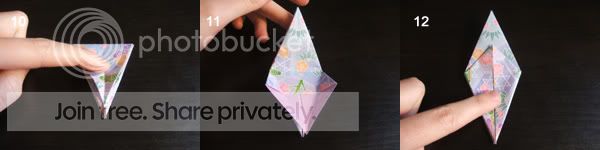
10. Fold the model in half to create a crease in the center.
11. Unfold the top of the model and two of the tabs.
12. Grab the bottom of the flap in the center and slowly bring it up, being careful not to tear the paper. This is very similar to step 15 in my detailed paper crane instructions. Do this step three more times.
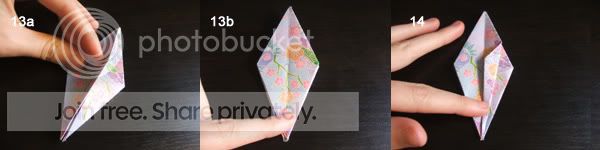
13a. Grab the edge of one of the newly formed tabs (there are still eight) and flip it to the other side of the model. This is mid-flip.
13b. This is what the model should look like after the flip. Do the same on the bottom of the model, in the same direction as your first flip (either clockwise or counterclockwise). The tabs should be evenly distributed - four on each side.
14. With the open end of the model pointing towards you, grab one of the tab's side corners and fold it so that the edge between the side corner and the bottom corner lines up with the center line of the model.
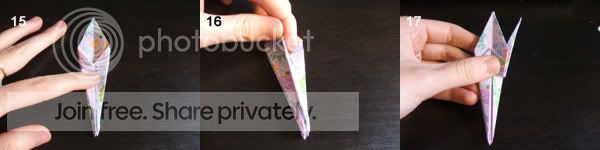
15. Do the same for the seven other tabs.
16. Flip the tabs again in the same manner as in step 13.
17. Do an inside reverse fold to bring up one of the four legs of the model as shown in the picture.
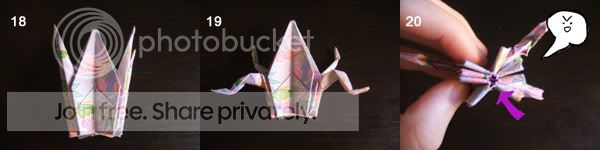
18. Do the same for the other three legs.
19. Use a combination of inside reverse folds and outside reverse folds to form the front and back legs of the frog.
20. I have to do this step when no one else is watching me because I'm childish like that. xD Blow in the hole at the bottom of the model to poof out the frog's head. Remember, it's just paper...
Adjust the frog's legs a little bit more to get the final product: