Welcome to Gaia! ::


User Image - Blocked by "Display Image" Settings. Click to show.
Yes! Tutorials to do all of the things you have been seeing around Gaia.
Is there a tutorial you want? PM me with your tutorial requests!

Q: Can I use MSPaint?
A: MSPaint isn't the best for these tutorials, these tutorials are not made for MSPaint. You can try if you wan't but I cannot offer any help.

Q: But all I have is MSPaint!!1
A: Download The Gimp HERE It's free and far better than MSPaint.
When Downloading the GIMP, Download the GTK environment first and install it, then install the Gimp!

Post2: iPods and Airheads
Post3: I Wish for an Animated Wishlist and How to Make a Wishlist
Post4: THE iPod! and Cheap Jedi
Post5: Glitteh and the Gaia Button
Post6: Basic Blinkie
Post7: Coloring with Gimp
Post8: Avatar Clothing

Other Maki Tutorials:
ImageReady and Movies

Links Out:
BleedingTruth
audiotune brought this site to my attention because they have MSPaint brushes, which is splendid since I cannot offer too much information on Paint since I do not use it.
exclaim The overdone iPod
arrow Start with a picture of your avatar, it can have an all white or all black background. Use the Magic Wand tool User Image - Blocked by "Display Image" Settings. Click to show. and select all of the Background.
arrow Using the Paint BucketUser Image - Blocked by "Display Image" Settings. Click to show. or a big Brush, fill in your selection with whatever Color you want. (ALT+Backspace does a fill in Photoshop)
arrow Invert your selection. Generally this is under a Select or Edit Tab.
--- Fill in your new selection with black. Deselect All.
arrow Using a PencilUser Image - Blocked by "Display Image" Settings. Click to show. or Small Brush draw the white box for the iPod.
---Draw the Headphones, one line from each ear, they meet just ender the neck.
---Draw on the screen and the Dial. Both in a light grey.
User Image - Blocked by "Display Image" Settings. Click to show.


exclaim Airhead
arrow Start with a picture of the Gaia Aniversary Balloon (provided)
--- Take a blueish color, use the eyedropper for an exact color, and paint out the GAIA (provided)
arrow Take an image of your avatar and cut out the head.
---Copy and Paste the Head over the Balloon (preferably on it's own layer)
---Shrink the Head so it fits inside the balloon.
--- Lower the Opacity of the head's layer to about 75 OR Paint over it with a mostly transparent shade of blue.
User Image - Blocked by "Display Image" Settings. Click to show.User Image - Blocked by "Display Image" Settings. Click to show.User Image - Blocked by "Display Image" Settings. Click to show.User Image - Blocked by "Display Image" Settings. Click to show.
exclaim I Wish...
arrow Take the New PM image and paint over the Envelope with white (provided)
--- Color the border around it any color you like.
arrow Make a new image with your avatar in it. Increase the Canvas Size so there is room to the right of your Avie.
--- Paste the Popup next to your avatar.
arrow On Gaia find the items you are Questing for.
--- Copy the Item image and paste it in your Pupup bubble. Save this image as "animation1" the next as "animation2" and so on and so on.
--- For mine I am also goin to spell out P.L.E.A.S.E. Saving each image as "animationP" "animationL"and so on. Since I already made an E, I'm not going to remake it.
User Image - Blocked by "Display Image" Settings. Click to show.User Image - Blocked by "Display Image" Settings. Click to show.User Image - Blocked by "Display Image" Settings. Click to show.User Image - Blocked by "Display Image" Settings. Click to show.
arrow Now that I have all of my frames I am going to Import them into my Animated Gif Maker. You can download many different Free ones at Downloads.com I use ImageReady, it is not free!
--- Import all of your frames into the animation program.
--- Make sure they are layed out properly and suplicate any that you may need twice.
--- Set their time per frame to Atleast .2 seconds a frame
User Image - Blocked by "Display Image" Settings. Click to show.

arrow Save your animation and upload it to the internet.
User Image - Blocked by "Display Image" Settings. Click to show.


exclaim How to Make a Wishlist
User Image - Blocked by "Display Image" Settings. Click to show.
arrow A wishlist is just a simply graphic depicting what it is that you wish to own. Some advanced ones have graphics to show what they have bought, found and what was donated to them.

arrow Step 1: Make a new file
--- Make a new image file in what ever image program you use (photoshop, mspaint, painter, etc) Make sure that it is no larger than 500 pixels tall and 500 pixels wide. If you have a sig that is any bigger than this a Mod will disable your sig privilages!

arrow Step 2: Backgrounds
--- You can also add an image in the background. If you are using Photoshop or a program with Layers, just add in the background image on the last layer. If you are using a program that does not have layers, Add the background first.

arrow Step 3: Make your Dream Avie with the GavSim or tekTek
---Make an Avie at http://gavsim.net or http://www.tektek.org Copy it and Paste it into your file.

arrow Step 4: Get those items!
--- You can get the small item images from the GavSim, once you have slected them from the drop down menu. To save Right-click on the image and select Save Image As. We save instead of copying in order to preserve its transparency.
--- Go into your image program and Open the saved item. Now you can Copy it and Paste it into your wishlist.

arrow Step 5: Text and Emoticons
--- You should also add text. "Your Name's Wishlist" will do, but you can say whatever you want. To add the "Donated" "Bought" "Found" You can save emoticons from Gaia, open them in your program, Copy and Paste them into your wishlist. We save emoticons to preserve their transparency. If you want to use other small images to show what you bought, found, or was donated, then just draw them, but keep them in another file or on another layer so you can add them when needed.

arrow Step 6: Save and Upload
--- Save your new wishlist as a GIF or preferably a JPEG. BMP files are usually way to big. Make sure it is under 100,000 bytes. Now its time to upload your image to the internet. Go to one of these image hosting places and upload your image.
You may need to make an account there. These places are FREE.
Photobucket: http://www.photobucket.com/
Imageshack: http://imageshack.us/
Xs: http://xs.to/index.php

arrow Step 7: Your sig.
---When you upload your picture you should get a URL that looks like this : http://imagehoster.com/image.jpg or something even longer. This URL needs to be placed in your Signature box. To get there click on Profile, Edit Profile and scroll down to Signature. Once there type
[img]place your URL here[/img]
Finally scroll down and click SUBMIT.
User Image - Blocked by "Display Image" Settings. Click to show.

User Image - Blocked by "Display Image" Settings. Click to show.

User Image - Blocked by "Display Image" Settings. Click to show.
THE iPod!

arrow Start with a new document, a bit taller than it is wide.
--- Select a rectangle region and fill it with a custom gradient that is dark-liiiigggght-dark
User Image - Blocked by "Display Image" Settings. Click to show.
--- Fill in the rectangle selection with the gradient.
arrow Make a slightly grey circle in the lower portion of the rectangle.
--- If in Photoshop add a slight Pillow Emboss as a Layer Style. Decrease the Shadow Opacity and the Structure Depth
User Image - Blocked by "Display Image" Settings. Click to show.
--- In the center of the circle make a second circle with a slightly darker grey border.
arrow At the top of the ipod make a new box for the screen. Round out the edges slightly. If In Photoshop go to Select-> Modify->Smooth about 5px.
--- Fill in the selection with a light bluish grey.
--- Make a medium Blue/Grey border inside of our box. If in Photoshop make a Layer Style-> Stroke->Position: Inside
arrow For the text on the wheel type the word Menu in that Blue/Grey. You may want to use a Bold San Serif font. San Serif means no feet, so no little extras on the letters.
--- With the same font and color make a >>| |<< and >|| for the buttons or snag them from another image. I drew over my text to fill in the shapes.
arrow For the screen you can do whatever you like! I added a dark Blue/Purple like and the word iPod
User Image - Blocked by "Display Image" Settings. Click to show.User Image - Blocked by "Display Image" Settings. Click to show.User Image - Blocked by "Display Image" Settings. Click to show.User Image - Blocked by "Display Image" Settings. Click to show.

Cheap Jedi
arrow Start with your avatar.
--- Draw a simple handle in your hand It is generally cylindrical, it doesnt have to be intricate, it's small anyway.
arrow Make a rectangle at a 45 degree angle. You can use the Polygonal Lasso while holding down SHIFT to make these angles. It doesnt have to be big. You can even use the Pencil tool and make a straight or angled line
--- Add a glow to the saber in a similar color. Increase the Opacity to 100%, the Spread to about 15% and the Size to about 3px.
User Image - Blocked by "Display Image" Settings. Click to show.User Image - Blocked by "Display Image" Settings. Click to show.User Image - Blocked by "Display Image" Settings. Click to show.
exclaim Glitteh!
arrow Start with a picture of your avatar. Make Three copies of it.
arrow For each copy add Noise. Make sure it is Gaussian and check the Monochromatic box(if it applies to your program)
--Set the amount to anywhere around 3-5
User Image - Blocked by "Display Image" Settings. Click to show.
arrow For Each picture draw a little star or if your program has a sparkle brush, just use that.
arrow In your Animated Gif Maker load each image and give them a timing of .1 seconds, or more if you prefer.
User Image - Blocked by "Display Image" Settings. Click to show.User Image - Blocked by "Display Image" Settings. Click to show.User Image - Blocked by "Display Image" Settings. Click to show.User Image - Blocked by "Display Image" Settings. Click to show.User Image - Blocked by "Display Image" Settings. Click to show.
idea You can also select only a small part of your image. In each picture select only the area you want to be glitter and add the noise to that selection.
User Image - Blocked by "Display Image" Settings. Click to show.

exclaim Gaia Button
arrow Start with any of Gaia's Oval buttons. Preview, Submit, any with the emoticon will work.
---Make your image canvas twice as long, or if you know how long your text is going to be, make it the length of your text.
User Image - Blocked by "Display Image" Settings. Click to show.
arrow Copy of of Gaia's emoticons. Paste it over the current one.
arrow Type in the words you want.
idea I use a size 9 Tahoma font + an outer glow with size 1, spread 0
User Image - Blocked by "Display Image" Settings. Click to show.
arrow Select the right half of the Gaia button and move it down to the end of the text.
User Image - Blocked by "Display Image" Settings. Click to show.
arrow Using a 1 pixel pencil/brush draw the black line back in for the top and the bottom. Fillin the center with whatever color you want.
---Crop out any of the canvas you don't need.
User Image - Blocked by "Display Image" Settings. Click to show.
idea If you know how to make an animated gif try saving the animated emmoticons and playing around with those.
User Image - Blocked by "Display Image" Settings. Click to show.
exclaim Basic Blinkies
arrow Start a new document. Make a small Square(or any shape) and fill it in with any color.
--- Make as many duplicated as you need for your blinkie and scoot them over.
--- Change the colors if you want and type out your letters, keep them seperate if you plan to move them.
arrow Import your images into your animated Gif maker.
idea I am showing two types, a moving up and down type and a moving color one.
User Image - Blocked by "Display Image" Settings. Click to show.
For the moving blinkie one I have a layer for each button and a layer for each letter. When it is the correct frame of animation I move the blinkie and the letter down. One frame of animation for every letter or square in the blinkie.
User Image - Blocked by "Display Image" Settings. Click to show.

User Image - Blocked by "Display Image" Settings. Click to show.
For the moving color blinkie I have all of my blinkies the same color except one. For each frame of animation I scoot it over to cover up the next blinkie.
User Image - Blocked by "Display Image" Settings. Click to show.
exclaim Coloring in GIMP
arrow Setting up your desktop.
Note: This is just how I prefer to work as it is similar to photoshop.
User Image - Blocked by "Display Image" Settings. Click to show.


1. Brushes and Tools. This should open up as soon as you load Gimp.
2. Your file, when you open a file it will create a new window, this is where you draw and such.
3.. Navigation. Go to Dialogs-> Navigation. This is very helpful when you zoom in. You can drag the box inside around and it will change where you are looking in window 2.
4. Layers. You gotta love em. This is what makes everything better. Go to Dialogs-> Layers to open up this window.

:Idea: Things to Know!
-> Brushes- the Paintbrush can be different shapes. These are known as Brushes. Personally I use Circular brushes though I know some great artists who use caligraphy type brushes, ones that are flatter and at a slant.

-> Opacity- Transparency, how see-through something is. This is mainly going to be used for your Layers and especially for your Brushes.

-> Eye Dropper- If you press CTRL and click on your painting you will take a Sample of the color that you clicked. This is VERY important for blending colors. Use a lower Opacity brush to blend colors by mixing.
Click here for an Example
I Sampled the Blue and using a 50% Opacity brush I painted onto the Red, then I sampled the New color and Painted it onto the Blue. I continued to sample the colors and blend them further. I turned down the Opacity further in the last image and blended more.

-> Zooming - You can Zoom in with SHIFT+ "+" and Zoom out with "-" When zoomed in use the Navigator to move around your canvas.


arrow Preparing your Line Art.
You'll want to start off with clean, inked like art. This is not an inking tutorial. You can scan in your work or, for the sake of practice, you can download the Orc lineart Here

Step1. You can't use transparency and such on the Background Layer. Duplicate the Lineart layer and delete the old one. Rename the layer "Lineart" or "Lines" Create a new White Layer. Name it Background. Make sure that Background is on the bottom.
Step2. Click on the Lines Layer. Change its Mode to Multiply.
Create a third layer, call it Color. Color should be inbetween Lines and Background.
User Image - Blocked by "Display Image" Settings. Click to show.


Step3. Color
User Image - Blocked by "Display Image" Settings. Click to show.On our color layer lets put down a basic skin color. My Orc is green. Use whatever color you like. This will be the basic, unshaded color of the Orc. I used a large circular brush with the Opacity set to 100%. After Coloring everything I made sure to erase everything that was over the lines. I then Locked the Color Layer's Transparency. User Image - Blocked by "Display Image" Settings. Click to show.
This will make it so that when we draw on Color it won't go outside of our lines.


Step4. Shadow
User Image - Blocked by "Display Image" Settings. Click to show.I tend to start the next step with coloring in the Shadows. This helps me to decide where the light source is coming from. In my Orc's case, its from the top right. Use a darker version of the first color. Sometimes its good to use a darker color with a hint of purple. I used a large circular brush with an Opacity of about 50%. Go over the darker areas, places where shadows will be cast, like the legs, tummy, neck and where two body parts are close.


Step5: Light and Bounce Light
User Image - Blocked by "Display Image" Settings. Click to show.My light source is yellow. For this reason I have painted Yellow highlights where the light would hit more, like the head, arm and leg. I have also added a bounce light, mine is a cool blue and its coming from the bottom left, pointing upwards. Im still using a lowered Opacity brush.


Step6: Details and Blending
User Image - Blocked by "Display Image" Settings. Click to show.This is a bit of a jump from the last step, and a lot has occured. I blended some of the colors. See the Tips at the top of this post for more info on blending. I also lightened the belly and colored the nails, horns and egg. I used a yellowish color for the horns and nails. I then used a dirty red for the top of the base of the horns and nails. I used a very low opacity, smaller brush with the red and streaked the nails.
I also added spots. Why not right? I painted white for the eyes and like our eyes, I added pink to the outside.
For the egg I used a blue and red. Similar to the nails, I used a small brush just to add some texture to the egg.
As you can see, I still have a lot of blending to do and a lot more detail to add.


Finishing Up: Blending and Additional Stuff
User Image - Blocked by "Display Image" Settings. Click to show.Here it is, finalized, or as far as I want to go. I have smoothed out the colors, added some more detail to the spots and given the egg a faint blue glow.

exclaim If you have used this tutorial please post what you've done, I would love to see. ^_^
If you need any further help or tips you can post your progress and Ill get back to you promptly.
Avatar Clothing
User Image
Difficulty: Moderately Easy
Tools: Pencil Tool
-This is just one basic way of drawing clothing on avatars. You should already have an idea about zooming in and using a pencil tool-

User Image 
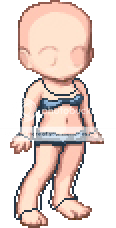
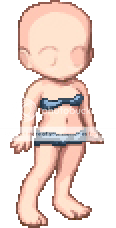
Step 1: Start with a base. This can be a guy or gal avatar, or any other base. (I put undies on mine!)


User Image
Step 2: Draw the outline to your outfit. It doesn't have to be perfect but it should make a nice silhouette.


User Image
Step 3: Make sure that your lines are now cleaned up. This means no over lapping pixels. (example pic) Also fill in your base color.


User Image
Step 4: Add shadows and folds. Get a good idea of how the fabric is draping.


User Image
Step 5: Add your highlights and your midtones. I'm still using just a few colors


User Image
Step 6: Finishing up. I have blended my brights a bir more and also shaded the outline. If you notice in Step 5 the outline is still the dark original color. Now I have lightened it where light would be hitting it. I have also added shadows on the avatar's base.
This is really helpful! I will have to look over it later!
~subscribes to thread~
ninja

Mewrie's Significant Otter

Festive Raccoon

<3
Really helpful. Thank you~!

Dapper Smoker

MS Paint doesnt suck, depends how you use it.
But good tutorials, Thankies heart

Quick Reply

Submit
Manage Your Items
Other Stuff
Get GCash
Offers
Get Items
More Items
Where Everyone Hangs Out
Other Community Areas
Virtual Spaces
Fun Stuff
Gaia's Games
Mini-Games
Play with GCash
Play with Platinum
//
//

Join Now

// //

Have an account? Login Now!

//
//